Infix in GNS3
Build and test networks virtually, no hardware required
GNS3 is a graphical network simulator that lets you build, cable up, and run virtual network topologies on your desktop. It is widely used for learning, lab work, and testing interoperability between different vendors — and Infix is available directly from the GNS3 Marketplace, making it easy to add to any project.
This post walks you through getting Infix running in GNS3, from installation to your first working topology.
The examples here use the x86_64 Infix build. GNS3 runs its device emulation via Qemu, which requires a Linux host — see the server setup section below if your organisation runs macOS or Windows.
Installing GNS3
GNS3 is best installed on a Debian-based Linux distribution such as Ubuntu or Linux Mint. Add the official PPA and install:
1
2
3
4
5
6
$ sudo add-apt-repository ppa:gns3/ppa
...
$ sudo apt update
...
$ sudo apt install gns3-gui gns3-server
...
During installation you will be asked whether non-root users should be allowed to run Qemu and use Wireshark. Answer yes to both, otherwise GNS3 will require
sudoevery time.
For Windows and macOS, download the all-in-one installer from gns3.com. It bundles the GNS3 VM — a small Linux virtual machine that handles the Qemu side — see the server setup section for more on how this works.
Adding the Infix Appliance
Infix is available directly from the GNS3 Marketplace. For a full walk-through of the install flow, see the GNS3 documentation. The steps below are Infix-specific:
- Open GNS3 and go to File → New Template
- Select Install an appliance from the GNS3 server and click Next
- Search for Infix in the appliance list and select it
- When asked for a disk image, click Download to fetch it
directly, or point it to a
.qcow2file you have already downloaded from the Infix releases page - Click Finish — Infix now appears under Routers in the device panel
Building a Topology
Creating a lab is drag, drop, and cable. As a first example we will build a simple gateway setup: a PC connected to the internet via an Infix router.
- Open or create a GNS3 project (File → New blank project)
- From the Routers panel, drag an Infix node onto the canvas
- From the End devices panel, drag a PC node onto the canvas
- From the Network devices panel, drag a Cloud node — this represents your host machine’s internet connection
- Use the Add a link tool (cable icon) to wire them up:
- Cloud →
eth0on Infix (WAN) eth1on Infix → PC (LAN)
- Cloud →
- Start all nodes with Edit → Start All Nodes
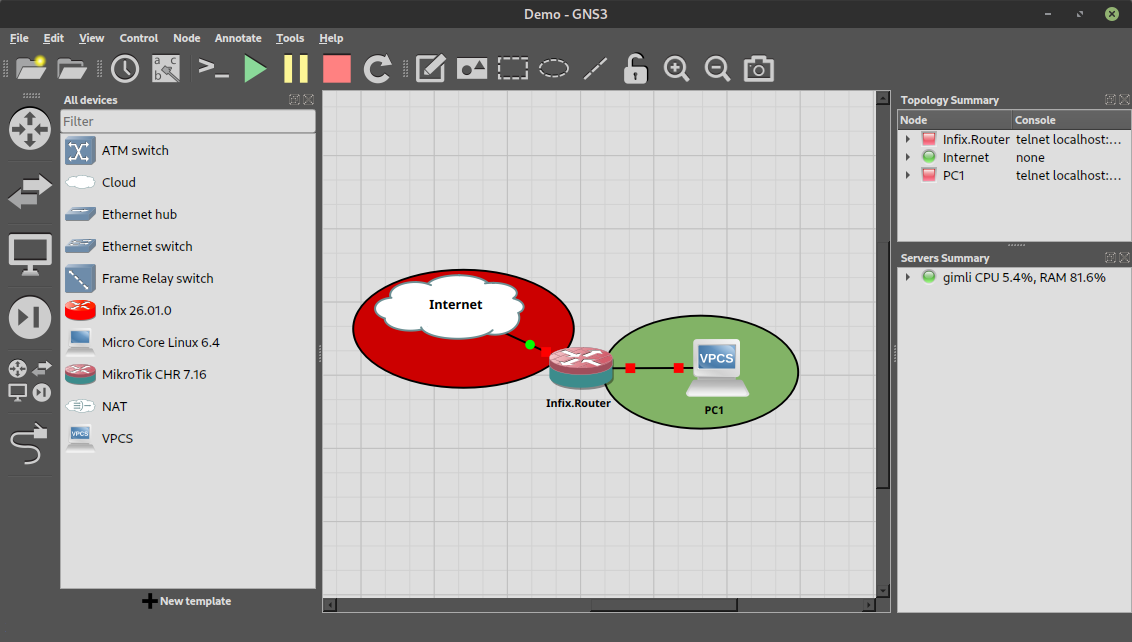 Figure 1: A simple gateway topology — Internet cloud, Infix router, and a PC, all wired up on the GNS3 canvas.
Each Infix node has 10 Ethernet interfaces (
eth0–eth9) by default, plenty for routing, switching, or both within the same node.
Once the nodes are running, right-click the Infix node and choose
Console to open a terminal. From there the workflow is identical
to real hardware: cli to enter the Infix CLI, configure to make
changes, and copy running-config startup-config to save them.
For more in-depth examples and multi-router topologies, see Jon-Olov’s OSPF Unnumbered Interfaces post — a six-router ring built and verified entirely in GNS3.
Server Setup
GNS3 has a split client/server architecture. The GUI handles the
canvas and your interaction; the server (gns3server) manages the
Qemu processes that actually run the devices. On Linux these run on the
same machine with no extra configuration needed.
On macOS and Windows the all-in-one installer includes the GNS3 VM — a small Linux virtual machine that acts as the server. The GNS3 GUI connects to it automatically, and Infix runs inside it. This works well for individual use.
Organisations running macOS across the board often find it more practical to set up a dedicated Linux server and point all GNS3 clients at it — this is exactly the setup we have helped customers with:
-
On a Debian/Ubuntu/Linux Mint machine, install and start the server:
1
2
$ sudo apt install gns3-server
$ gns3server
-
On each Mac, open GNS3 and go to GNS3 → Preferences → Server → Remote servers and add the Linux machine’s IP address and port (default
3080)
All Qemu emulation runs on the Linux server while each user works from their GNS3 GUI on their Mac. The Infix appliance only needs to be imported once, on the server side.
The server must be x86_64 Linux — Infix ships an
x86_64build for exactly this purpose. There is no native macOS or Windows Infix build.
Where to Go Next
With Infix running in GNS3 you have the full feature set available — routing, switching, containers, firewall, WireGuard — all without any physical hardware. A few posts to continue with:
- Getting Started with Infix — the Qemu command-line workflow if you prefer working without a GUI
- OSPF Unnumbered Interfaces — a multi-router topology built and verified entirely in GNS3
- Zone-Based Firewall — set up a firewall between zones in a virtual topology
- Full documentation — the complete Infix user guide, including the virtual environments section