Introducing the Web Interface
Infix has always been a YANG-native system: every setting lives in a model-backed datastore, reachable over the CLI, NETCONF, and RESTCONF. With v26.06 we add a fourth way in: a built-in web interface.
It is not a separate configuration path with its own quirks. The WebUI speaks RESTCONF to the same datastore as everything else, so what you see and change in the browser is exactly what the CLI and NETCONF see. One source of truth, now with a point-and-click front end.
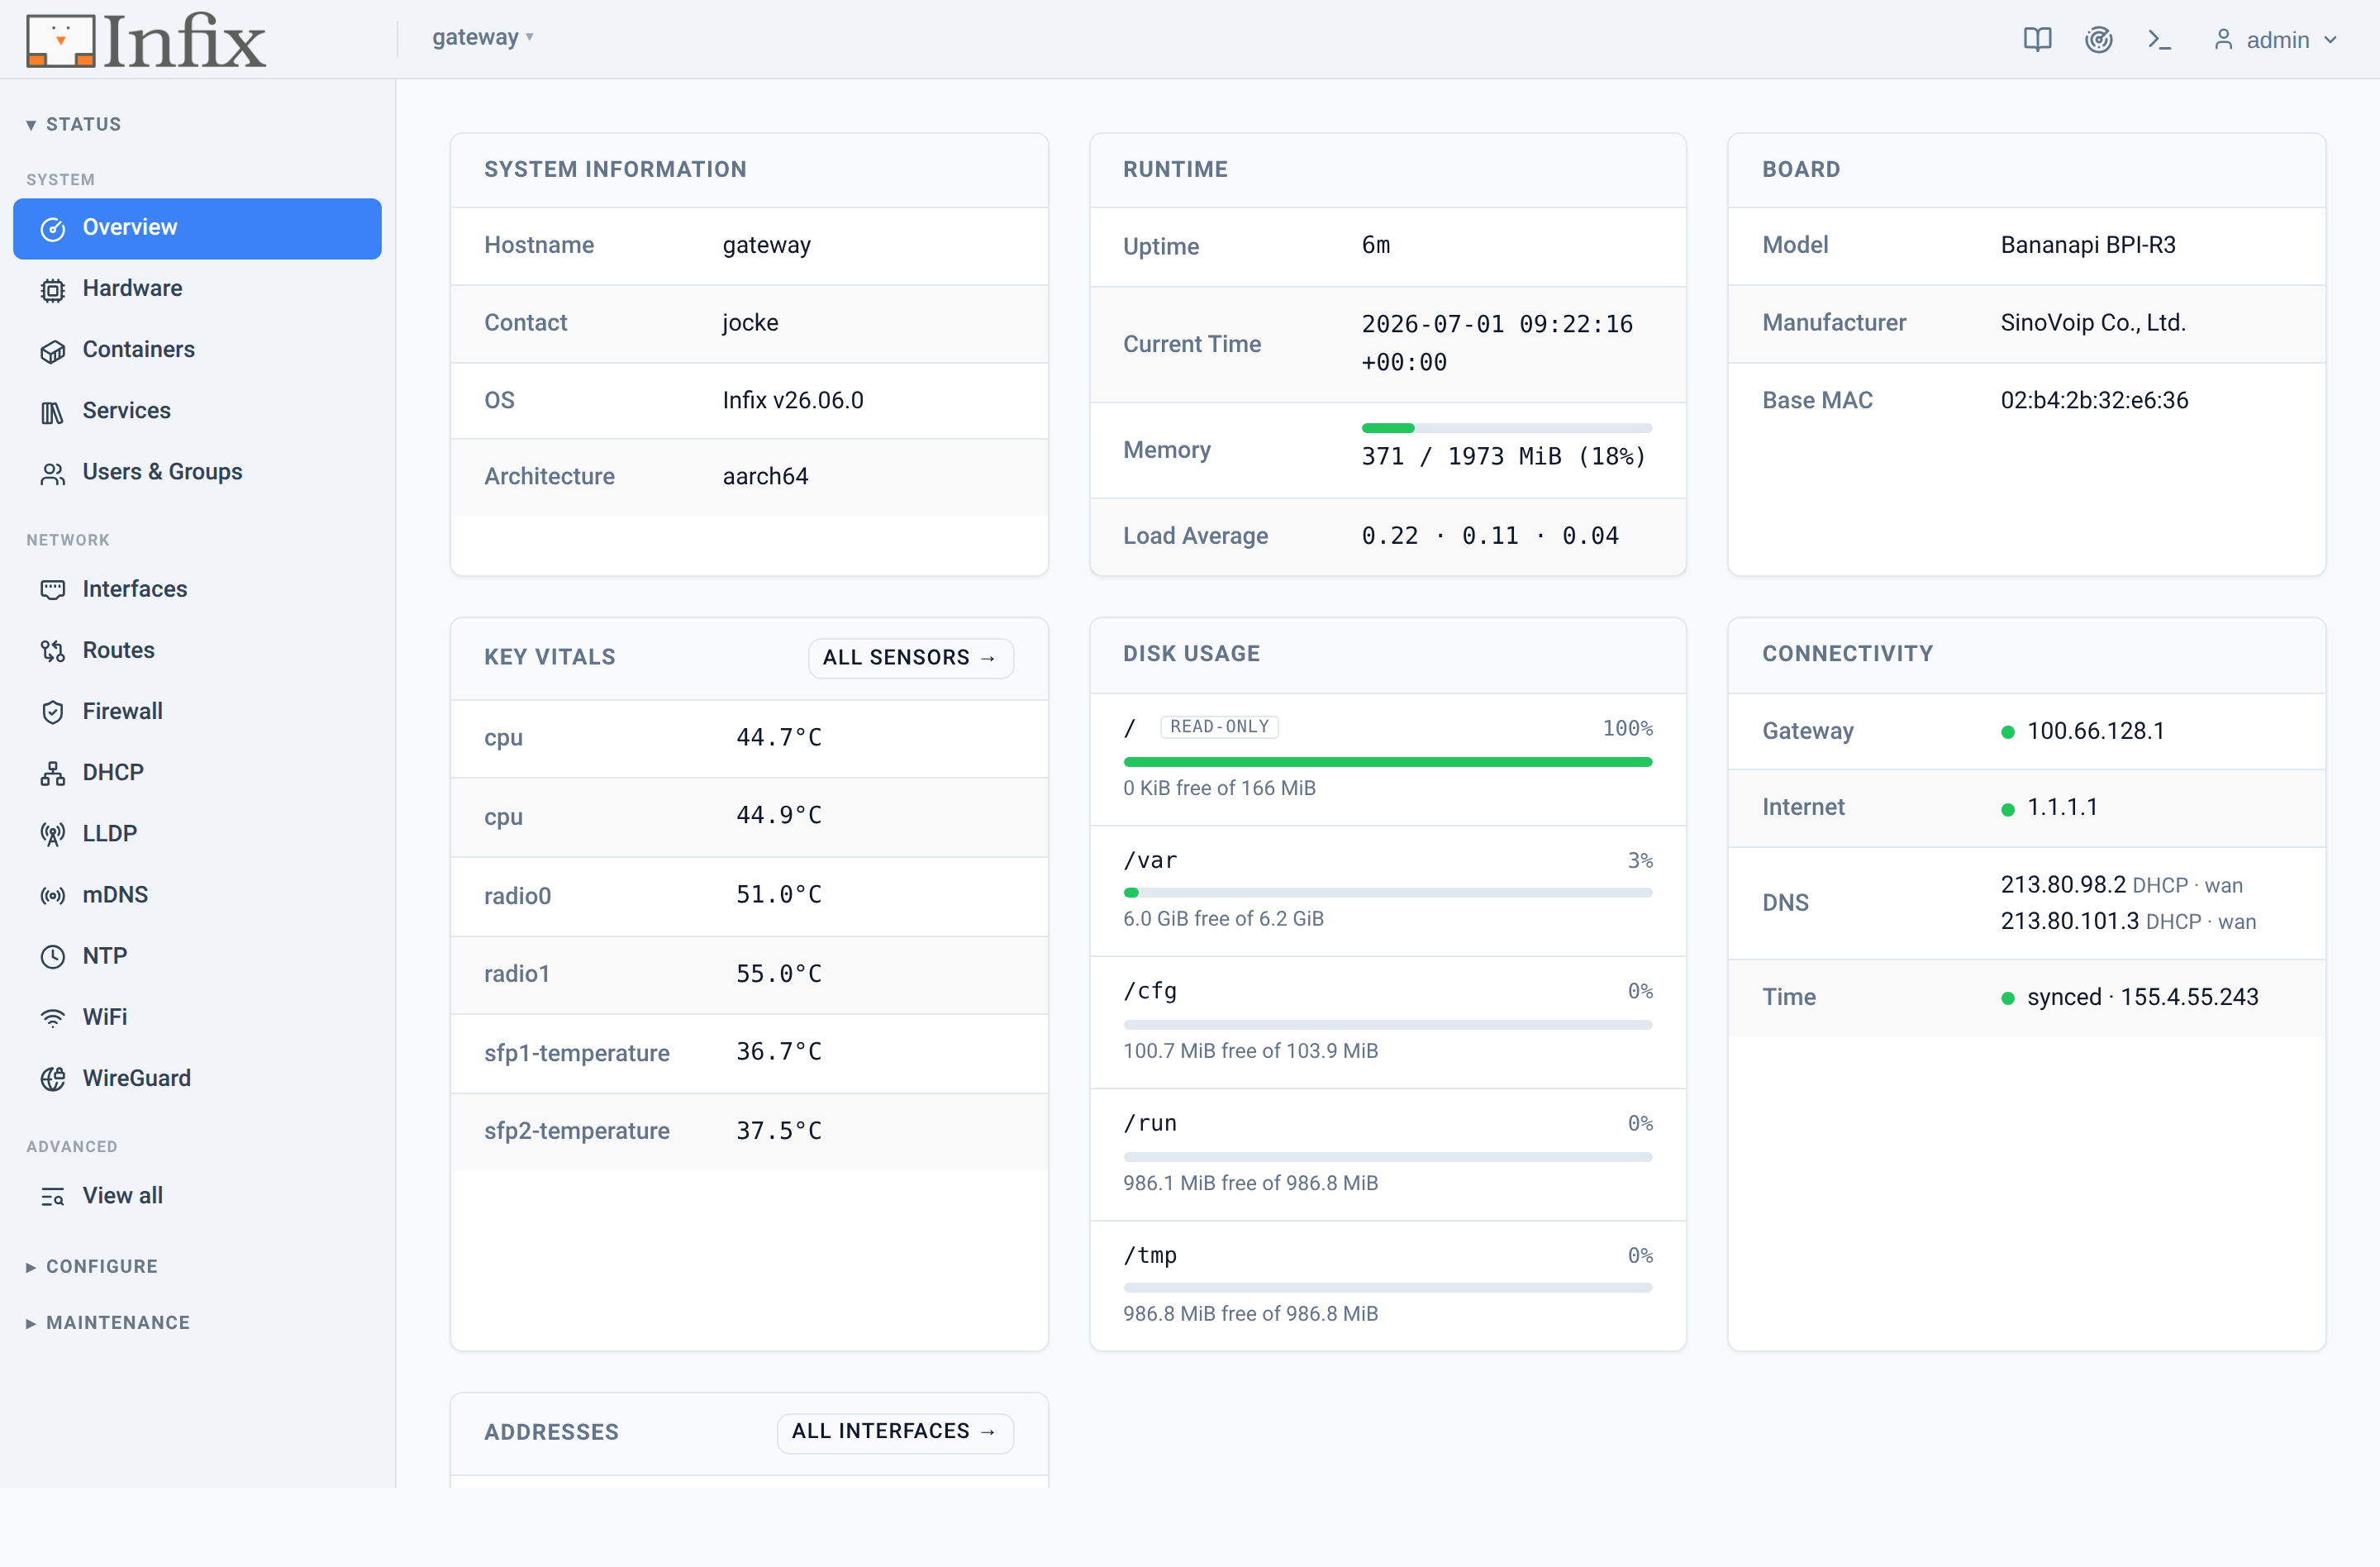 Figure 1: The Overview page — system, board, vitals, connectivity, and addresses at a glance.
A guided tour
The landing page is Overview. Across the top sit System Information (hostname, contact, OS build), Runtime (uptime, memory, load), and Board (model, base MAC). Below, a Key Vitals panel with the hottest sensors (CPU, radios, SFP modules) sits beside Disk Usage, a Connectivity card (default gateway, Internet reachability, DNS, and time sync), and an Addresses summary. Enough to answer “is it healthy, reachable, and what is it?” without a click.
The sidebar splits into three groups: Status for read-only operational data, Configure for changing settings, and Maintenance for the lifecycle tasks.
Status at a glance
If there is one screen to show a newcomer, it is Interfaces. It
lists every interface with its state, and nests the members of a bridge
directly underneath it, so you can see at a glance that lan1–lan4
are bridged into br0 and forwarding, while the uplink wan pulls a
DHCP lease of its own. When an interface joins a bridge it becomes a
bridge port, and the list reflects that: the status column shows the
bridge port state (forwarding, disabled, …) rather than a plain
up/down.
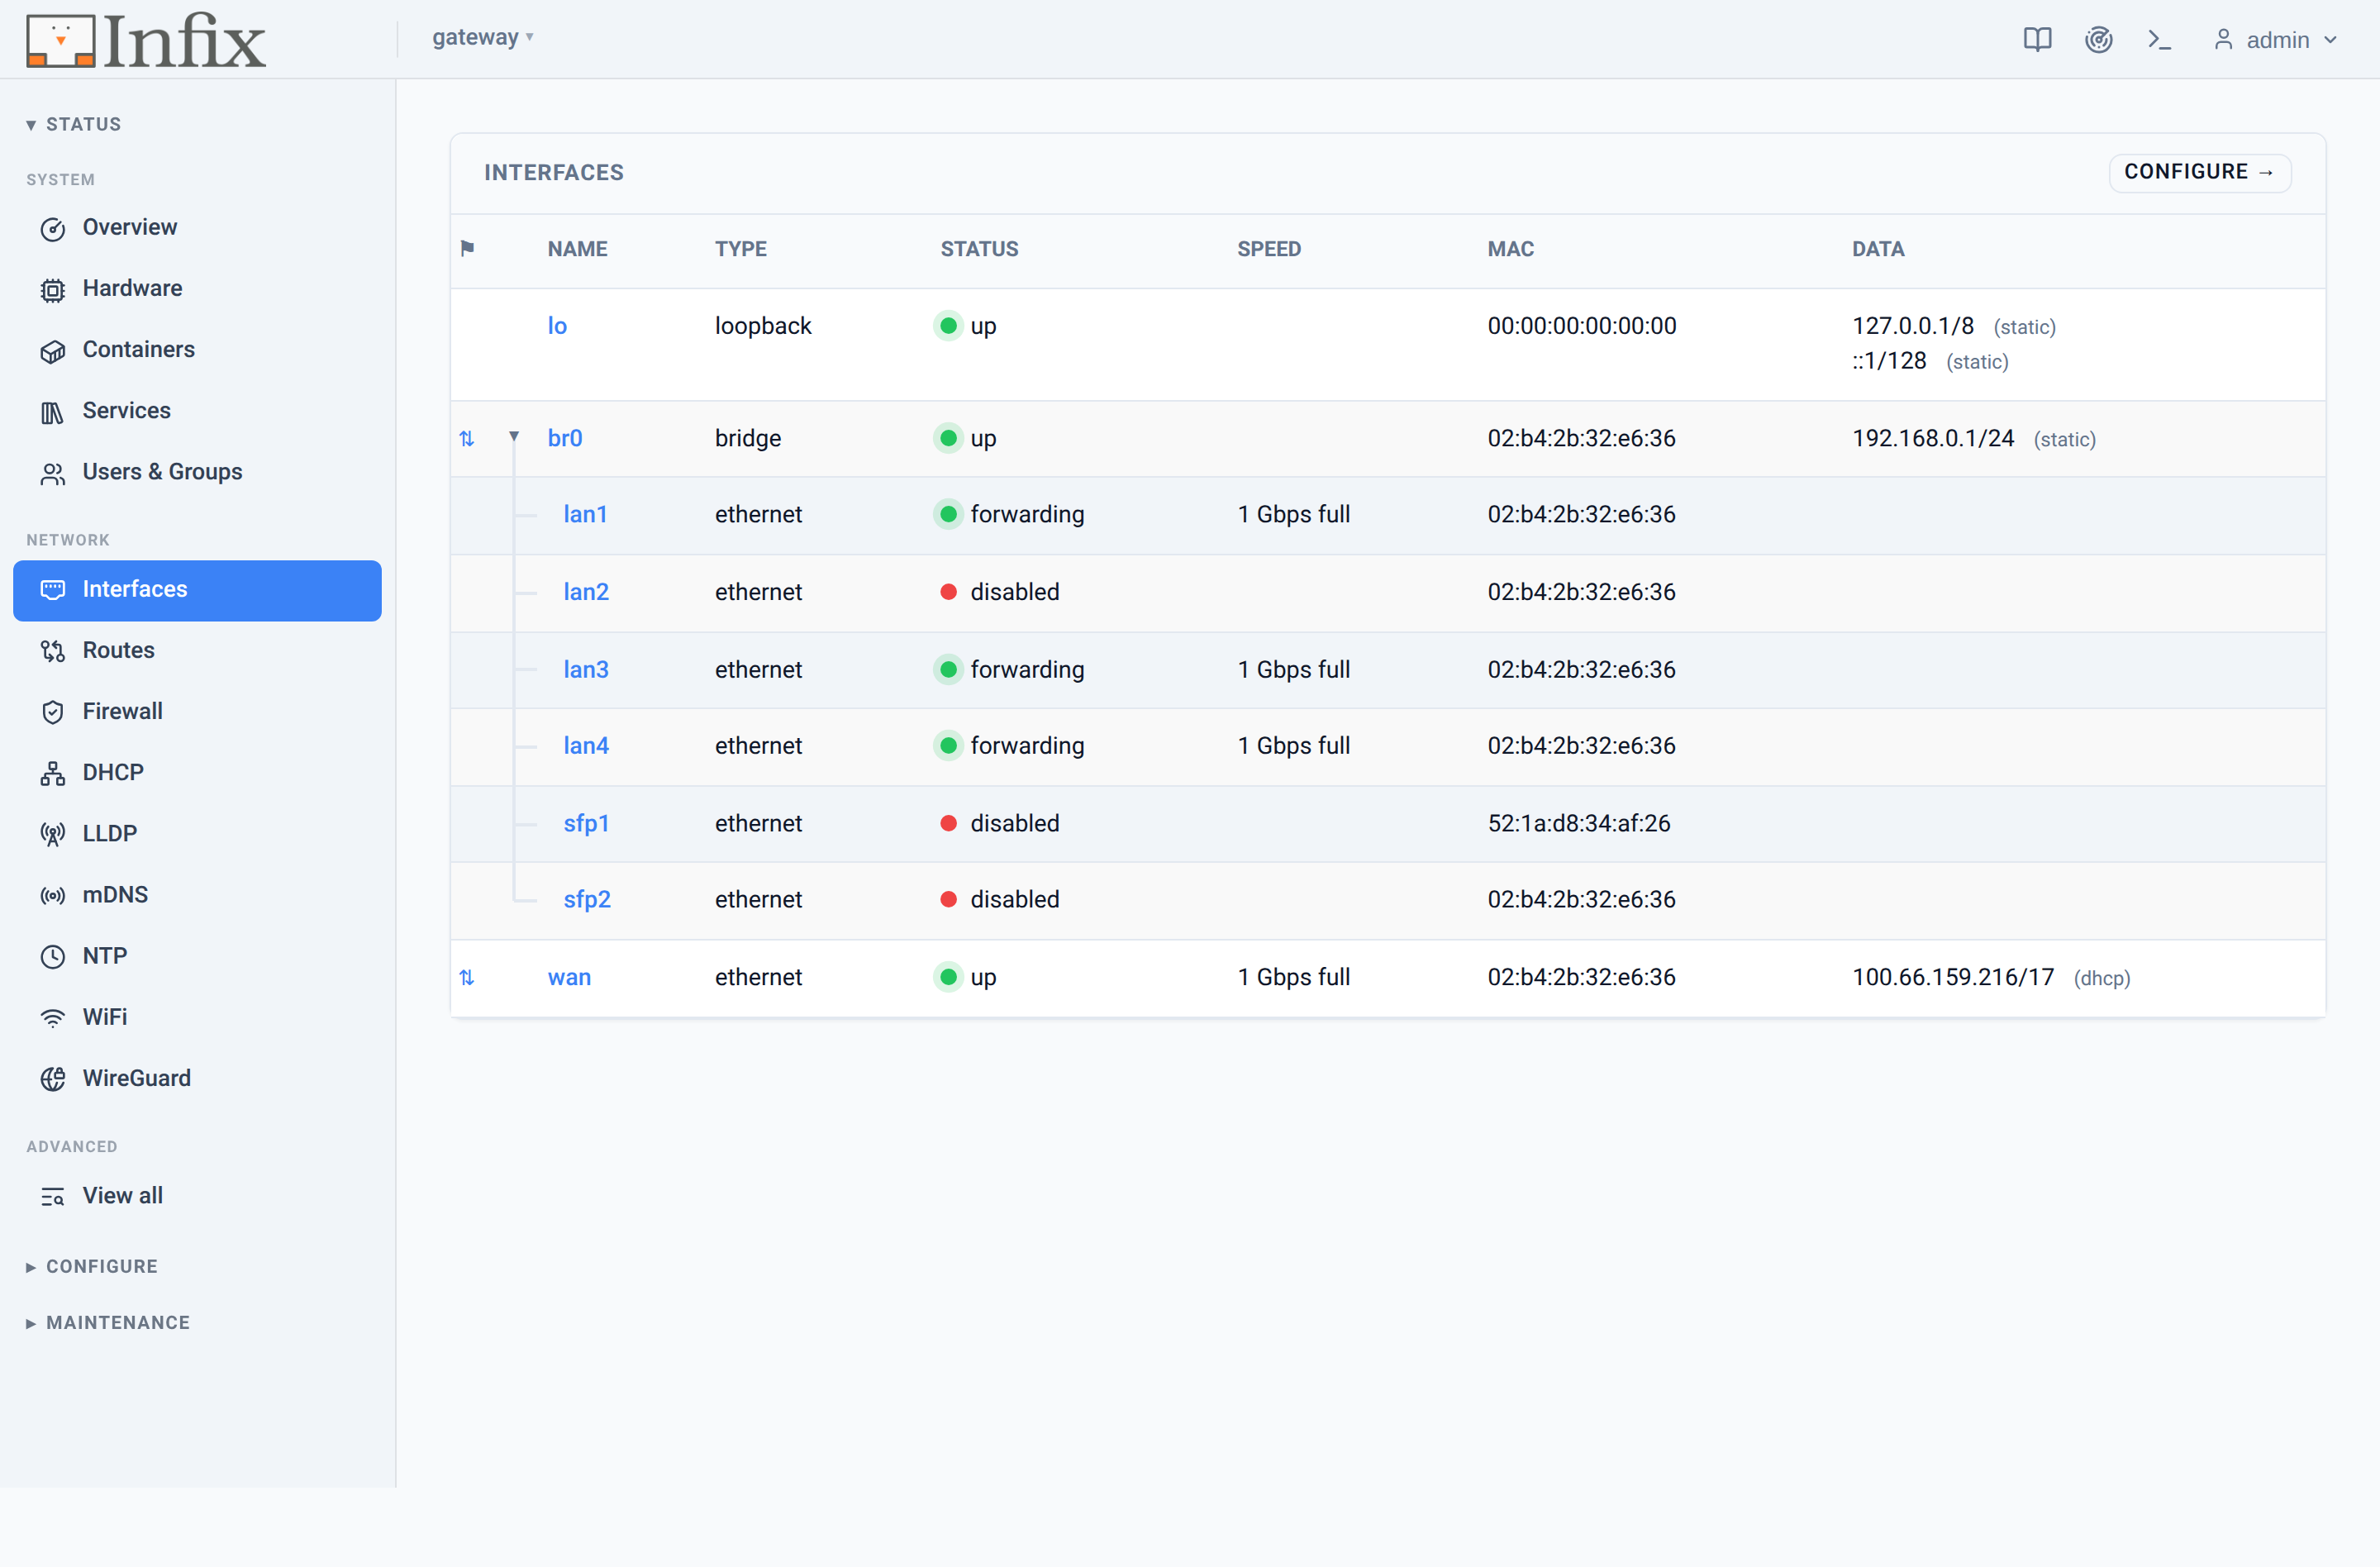 Figure 2: The Interfaces overview — bridge members nested under
 br0, each with its bridge port state.
Click any interface to open its detail page: link speed, duplex, PHY and PMD type, the supported and advertised link modes, and a counters panel that updates live. Other interface kinds show what matters for them: the station table and scan results for Wi-Fi, peer state for WireGuard, frame statistics for Ethernet. Alongside sit the familiar operational tables: routes, services, DHCP leases, LLDP and mDNS neighbours, and hardware sensors.
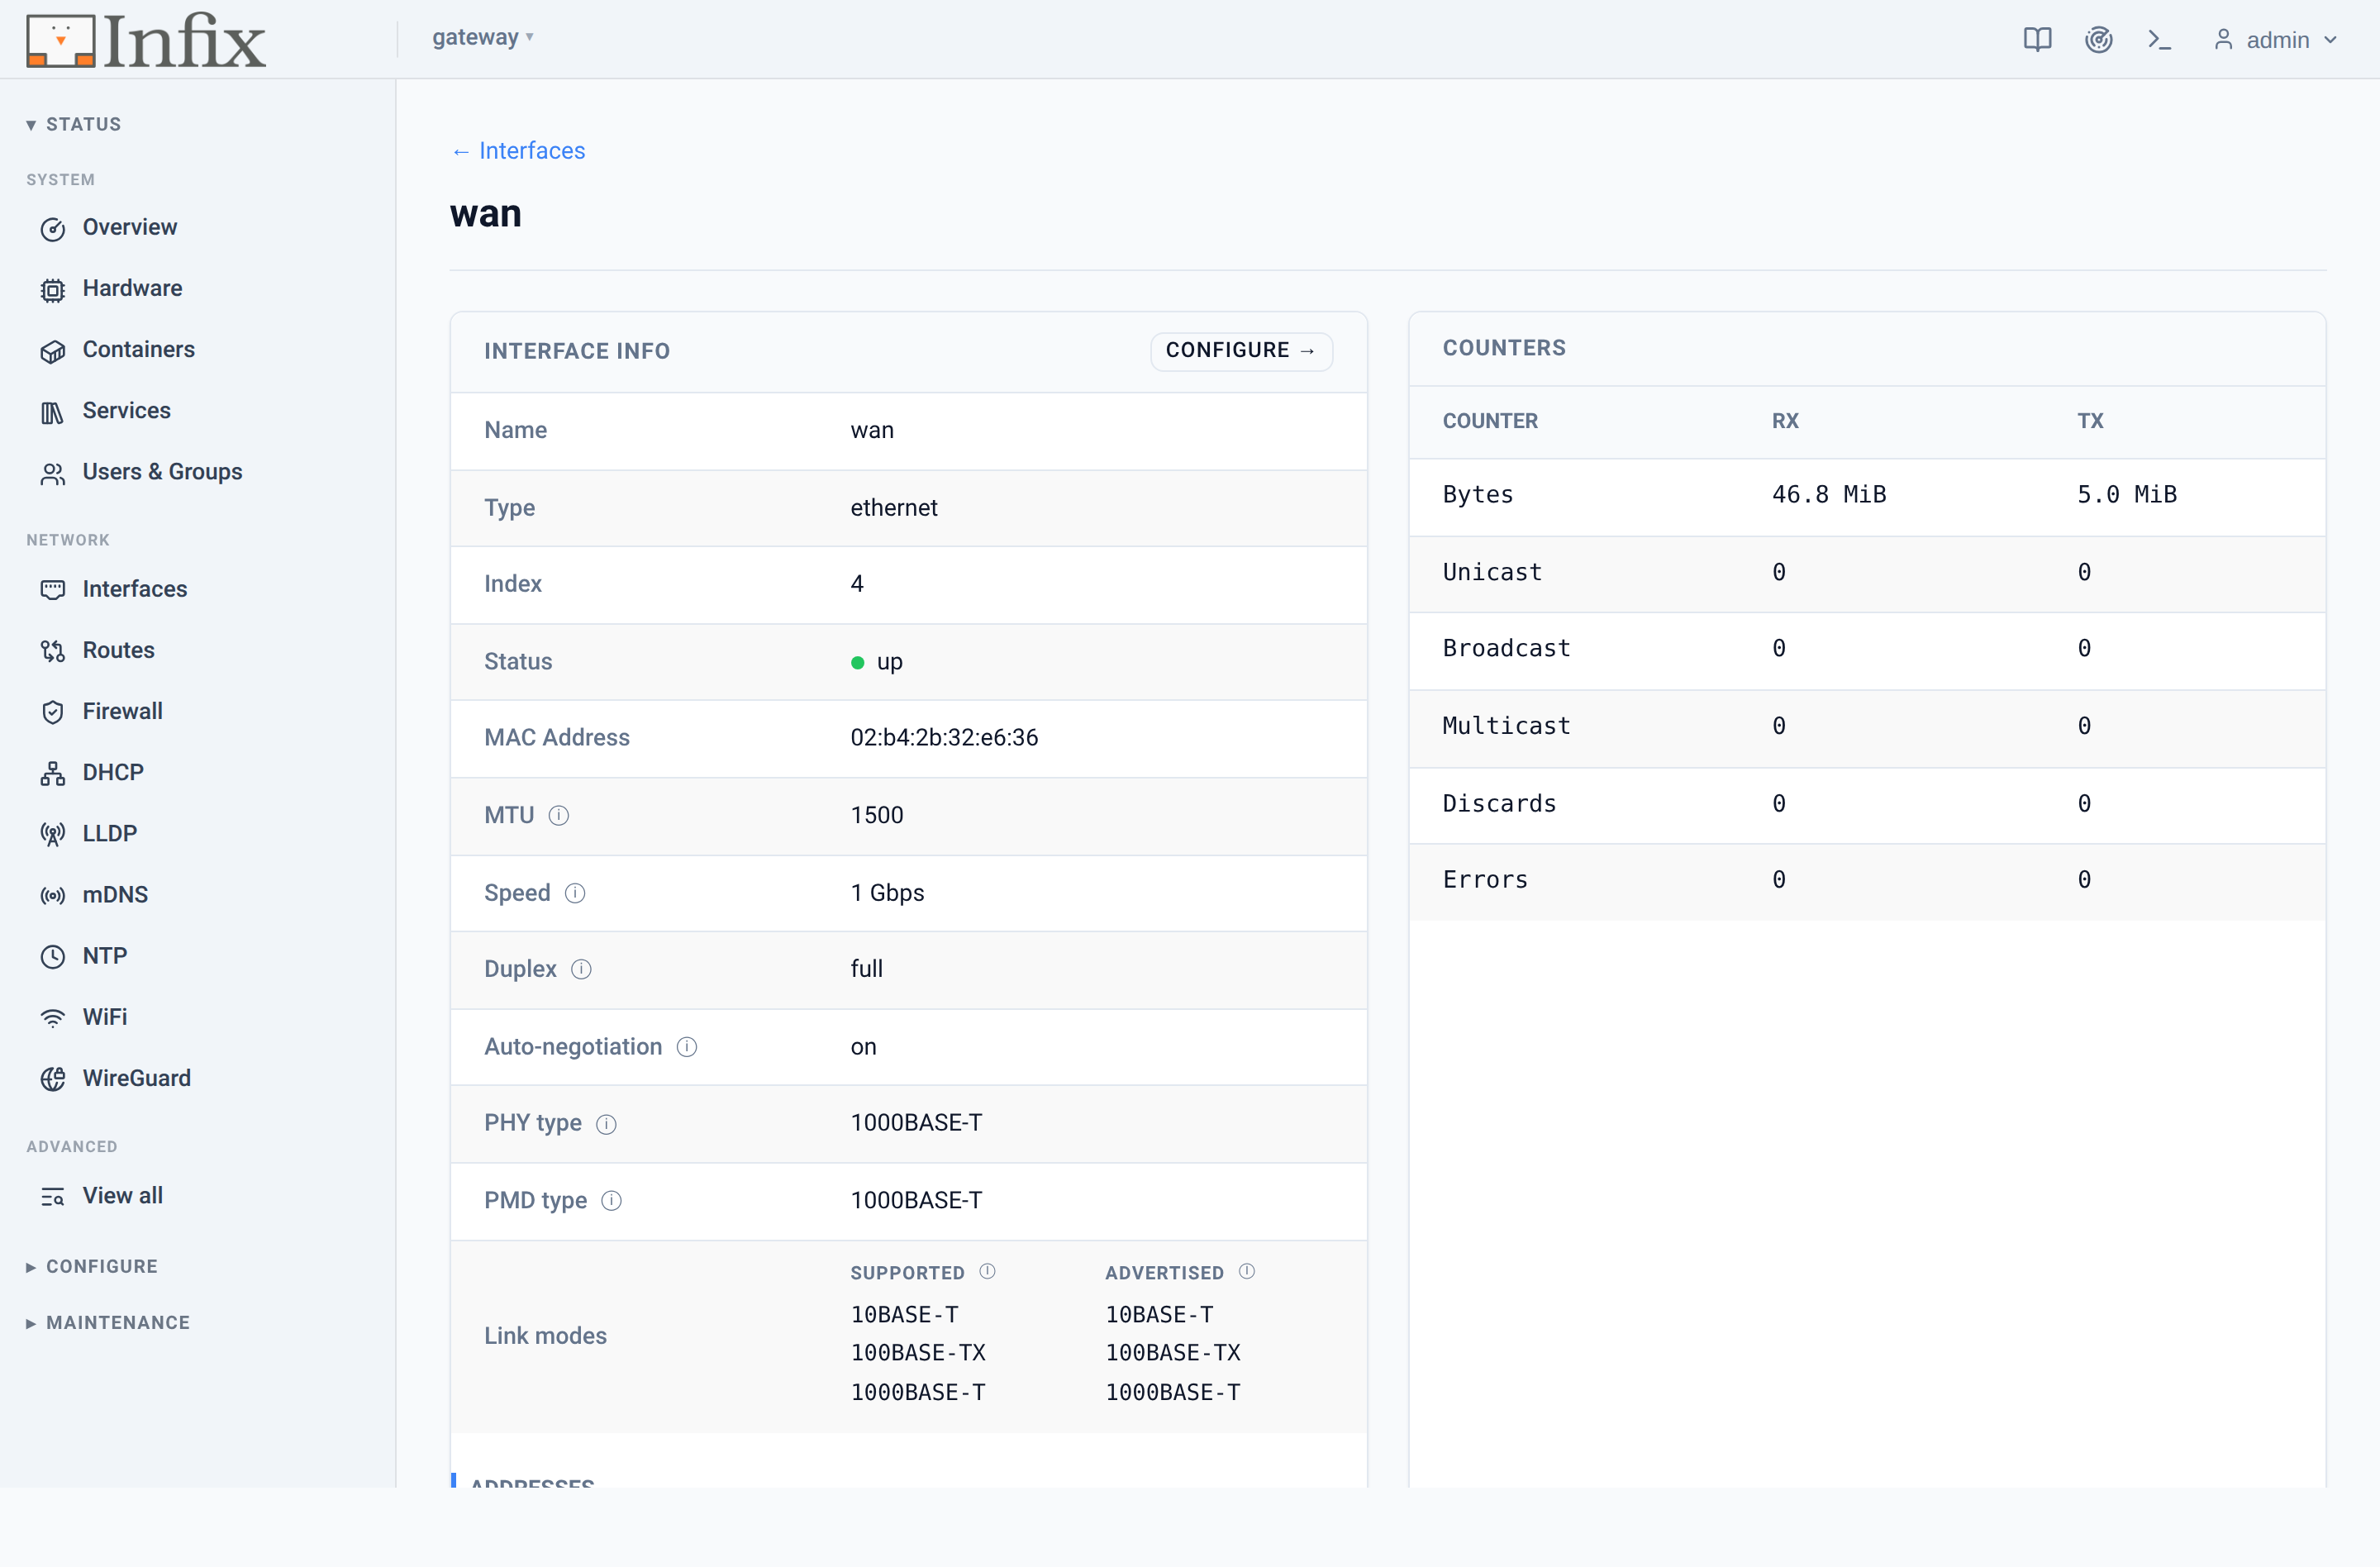 Figure 3: Interface detail — link info and live-updating counters.
Configuring the device
Configure gives you curated pages for the everyday tasks: system settings, users and groups, interfaces, routing, firewall zones, and the DNS and NTP clients. The interface page, for instance, lays out your interfaces and their addressing at a glance (a LAN bridge here, DHCPv4 on the uplink there) and lets you edit one at a time instead of wrestling a giant form.
Changes are staged, not applied blindly. You build up an edit and then
choose Apply to load it into the running configuration, or Apply &
Save to also persist it to startup: the same running versus
startup model you know from the CLI, with an Abort to back out.
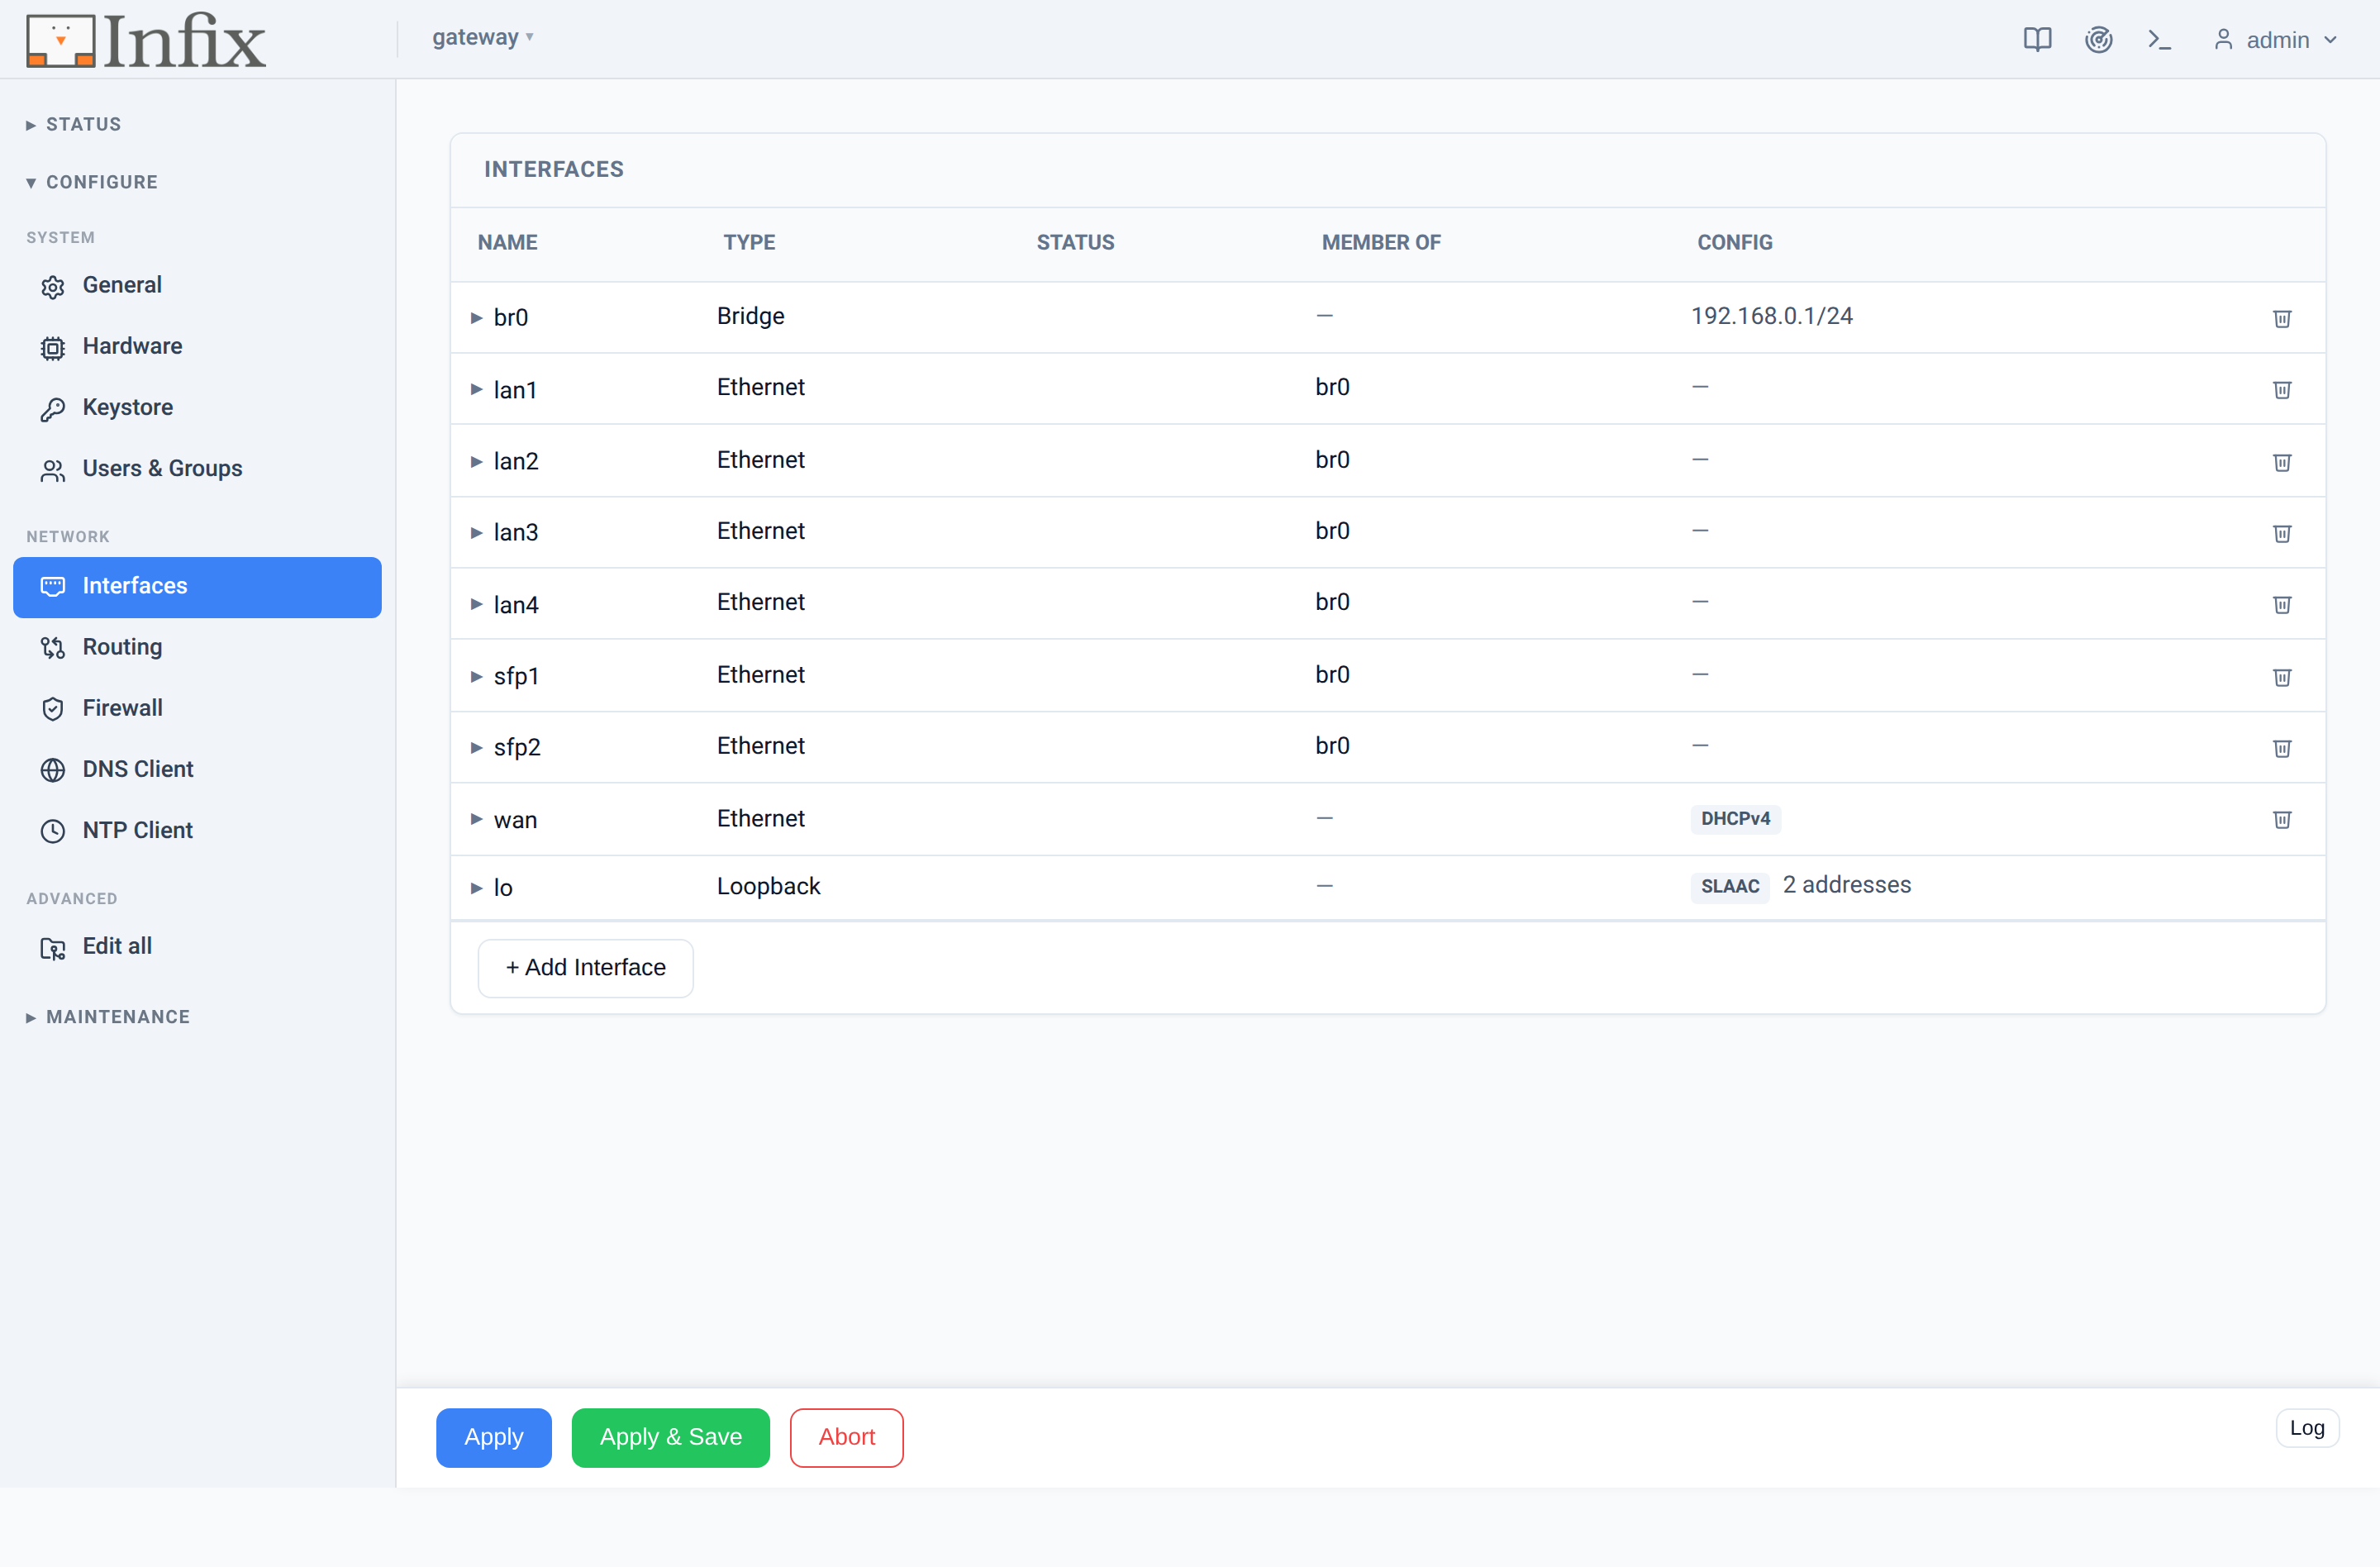 Figure 4: The Configure → Interfaces page, with staged Apply / Apply & Save.
Advanced: the full YANG tree
Curated pages cover the common cases; they do not cover everything. For the rest there is Edit all, a navigable view of the complete YANG tree. Pick any node and the panel on the right renders an editor for it, generated straight from the model, right down to leaves the curated pages never touch. Nothing is hidden.
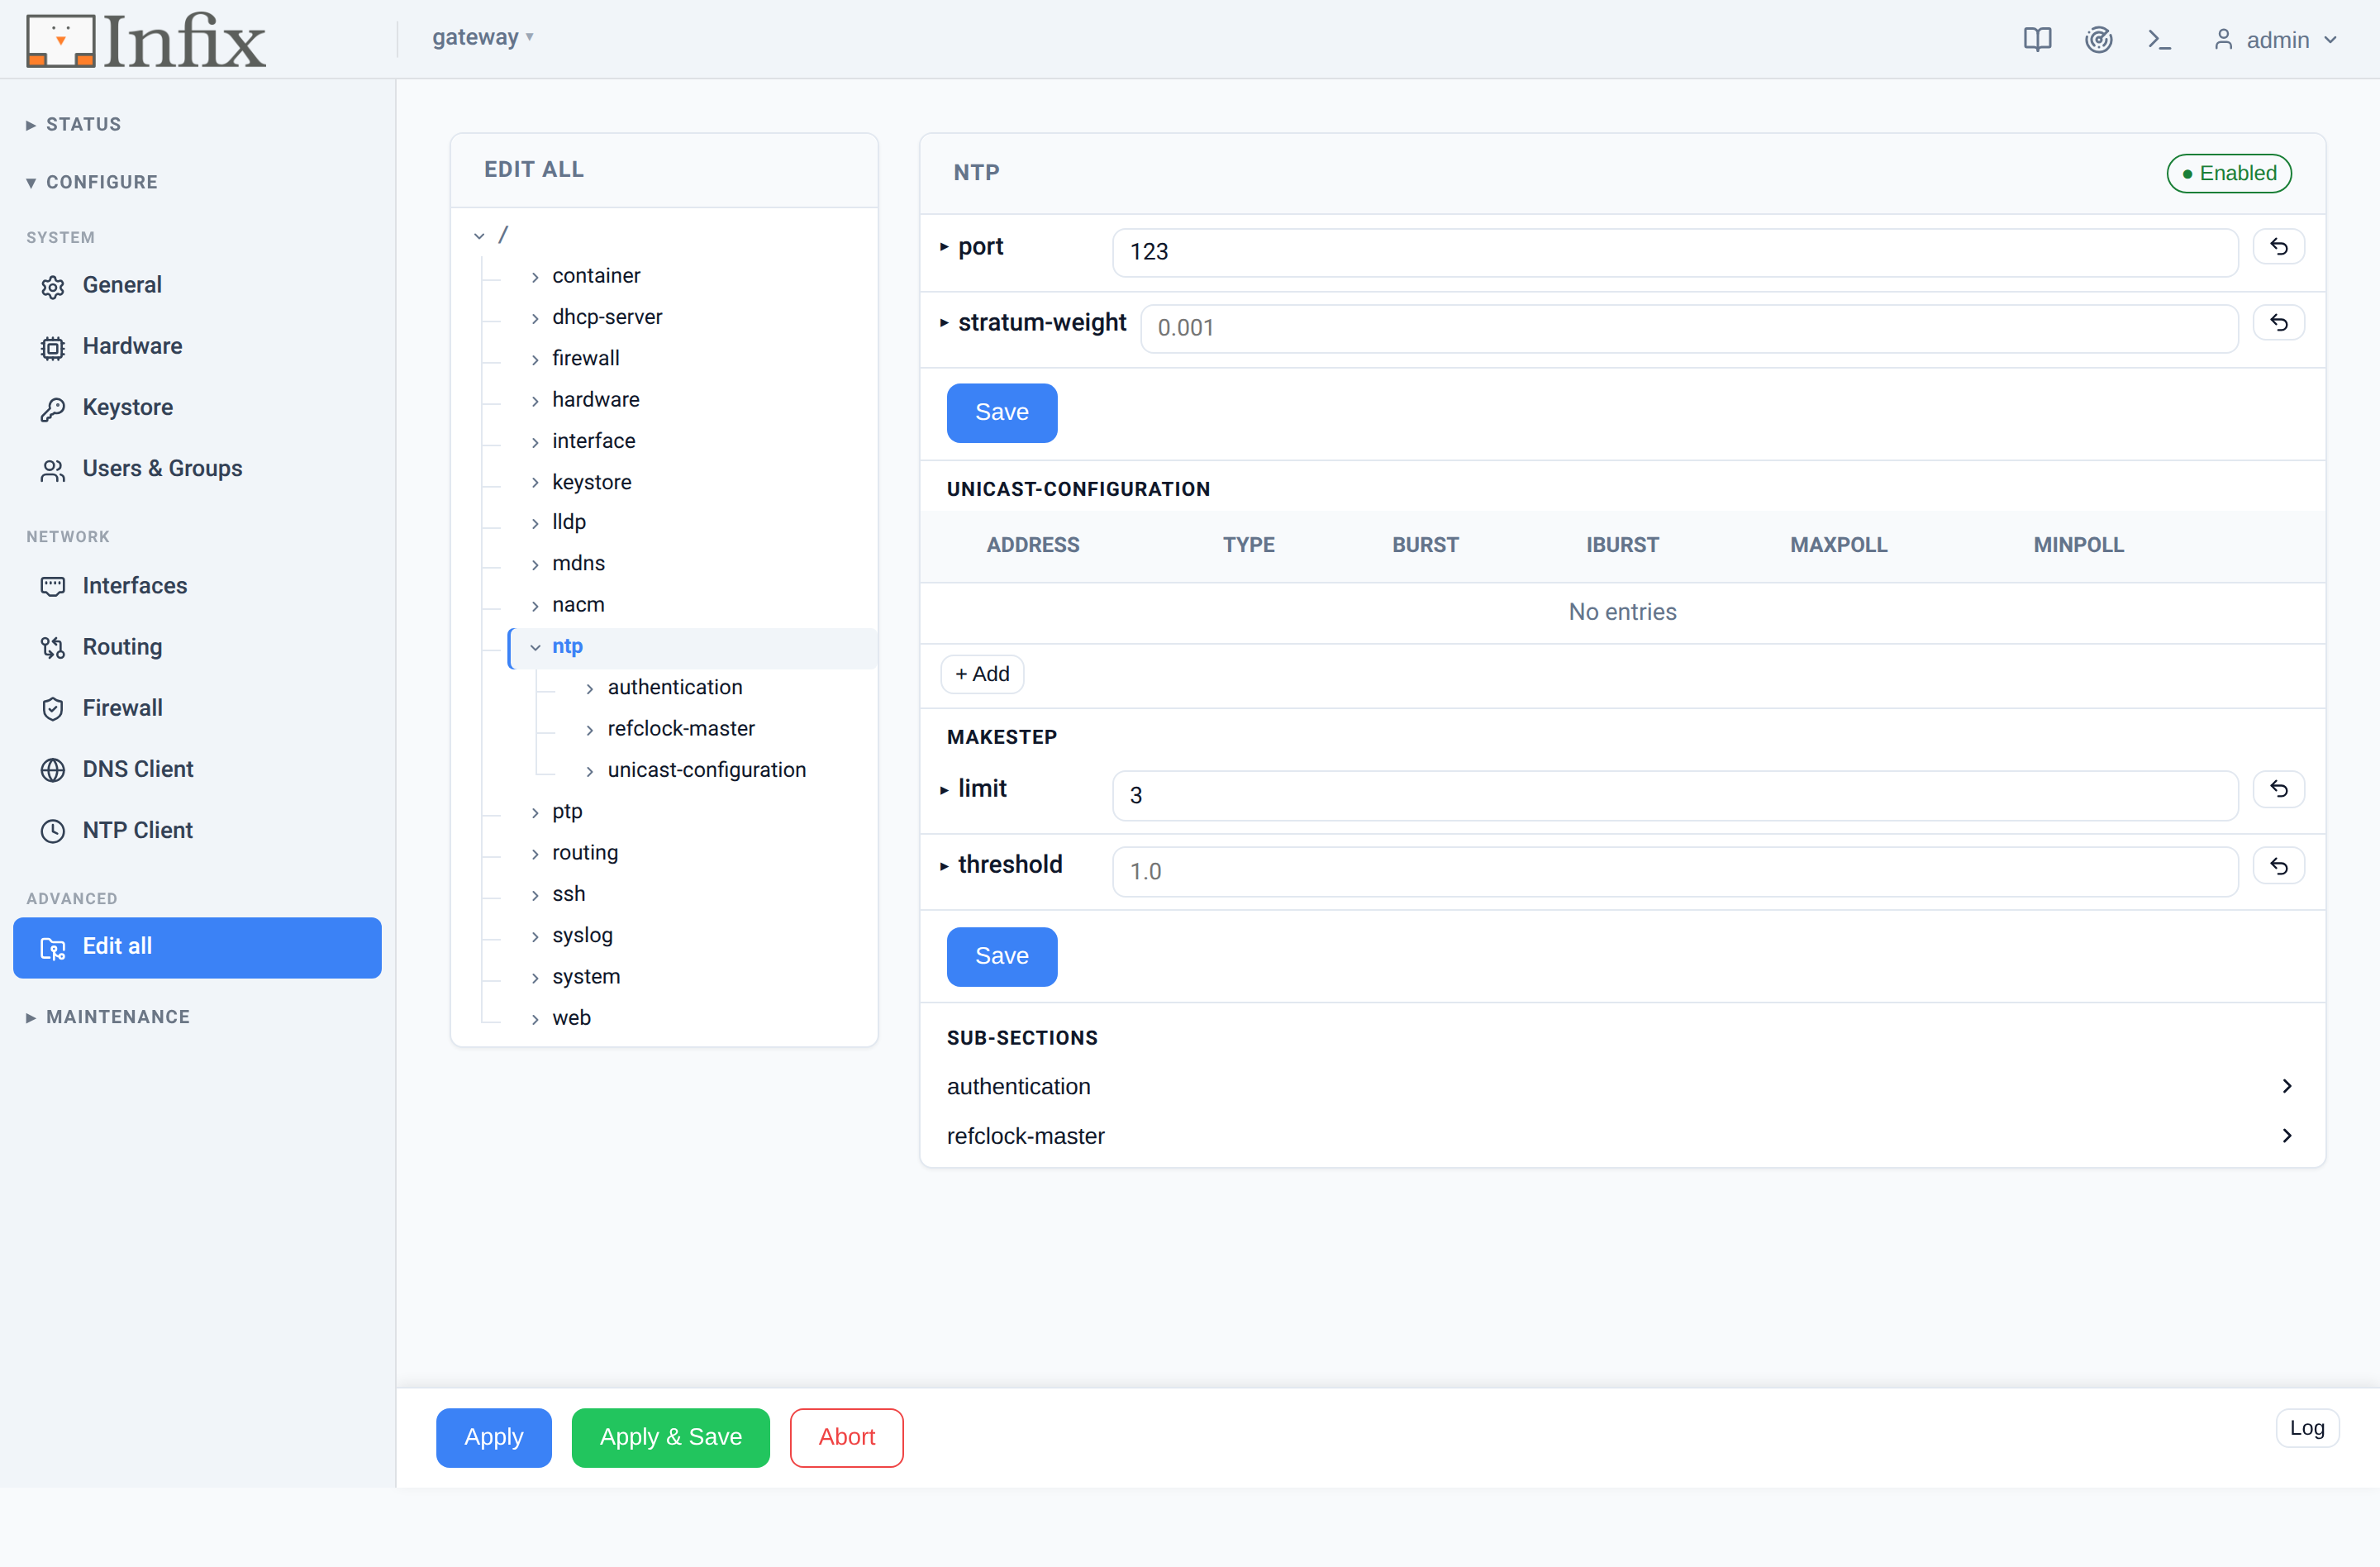 Figure 5: The advanced tree editor, here editing the NTP subtree.
Maintenance
The Maintenance section handles the lifecycle bits. Software shows the two firmware slots with their versions and boot order, and installs a new image from a URL or an upload, with an optional reboot when it is done. Backup & Support downloads a configuration backup, restores one (older backups are migrated to the current format automatically), and produces a support bundle. Rounding it out are a Logs viewer, Diagnostics, and a guarded System Control for reboot, shutdown, and factory reset.
Shortcuts to a web console and the network neighbour browser sit in the top bar, next to a light/dark theme toggle and the bundled User’s Guide.
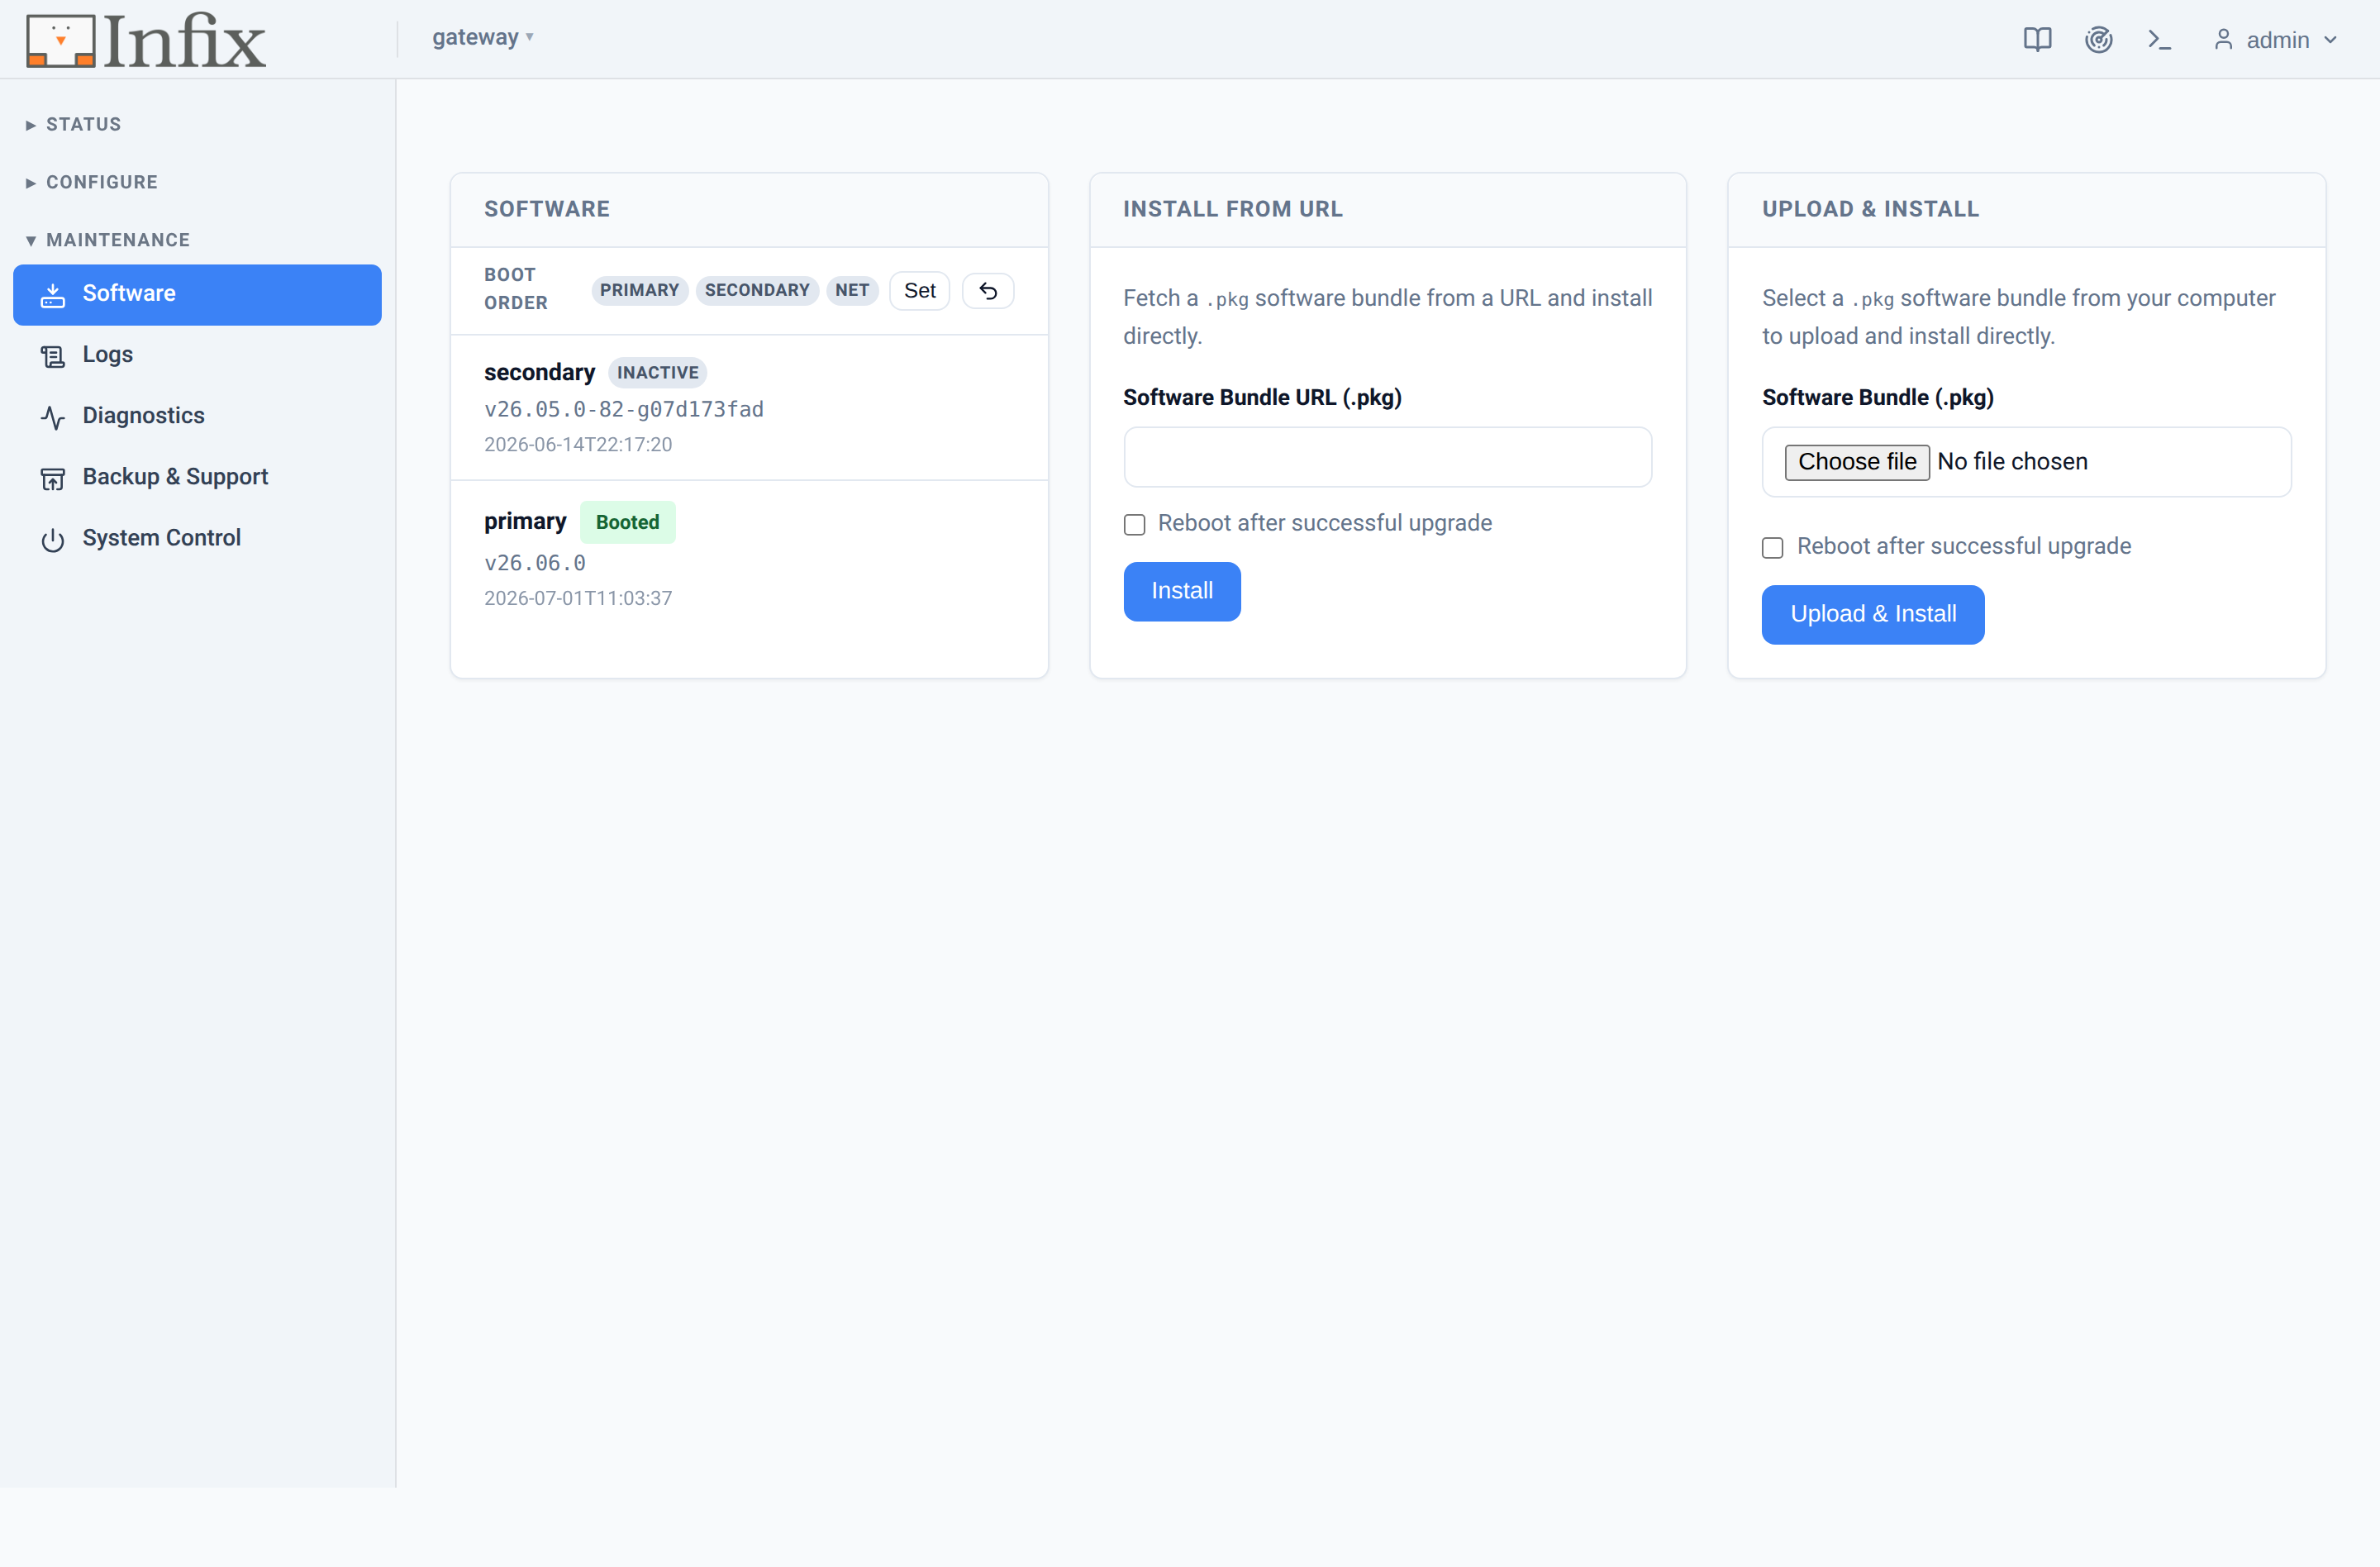 Figure 6: Firmware slots and boot order in the Maintenance section.
Built to fit
Infix runs on everything from a Raspberry Pi to industrial switches tucked into a cabinet with no Internet in sight, and the WebUI is built for that world:
- One static binary. Written in Go with htmx for interactivity, it ships as a single executable with every template, stylesheet, script, and icon embedded. No Node build step, no runtime dependencies.
- Fully offline. Every asset is served from the device itself; nothing is fetched from a CDN, so it works the same on an air-gapped network as it does on your desk. Even the User’s Guide is on board.
- RESTCONF underneath. The server is a thin translator: it turns page views into RESTCONF requests and renders the responses. Anything the WebUI does, you can script over the same API.
Try it
Grab v26.06 or later, then reach the device however suits
you: point a browser straight at it (say https://192.168.0.1 or its
hostname.local name), or open https://network.local from any host on
the same LAN. Any Infix device on the segment serves that page; behind
it, a small neighbour browser walks the network over mDNS and lists every
Infix device it can see, each linking straight to its web interface and
console. Flip it to All mode and it shows every other mDNS responder
on the segment too. Log in with your device credentials.
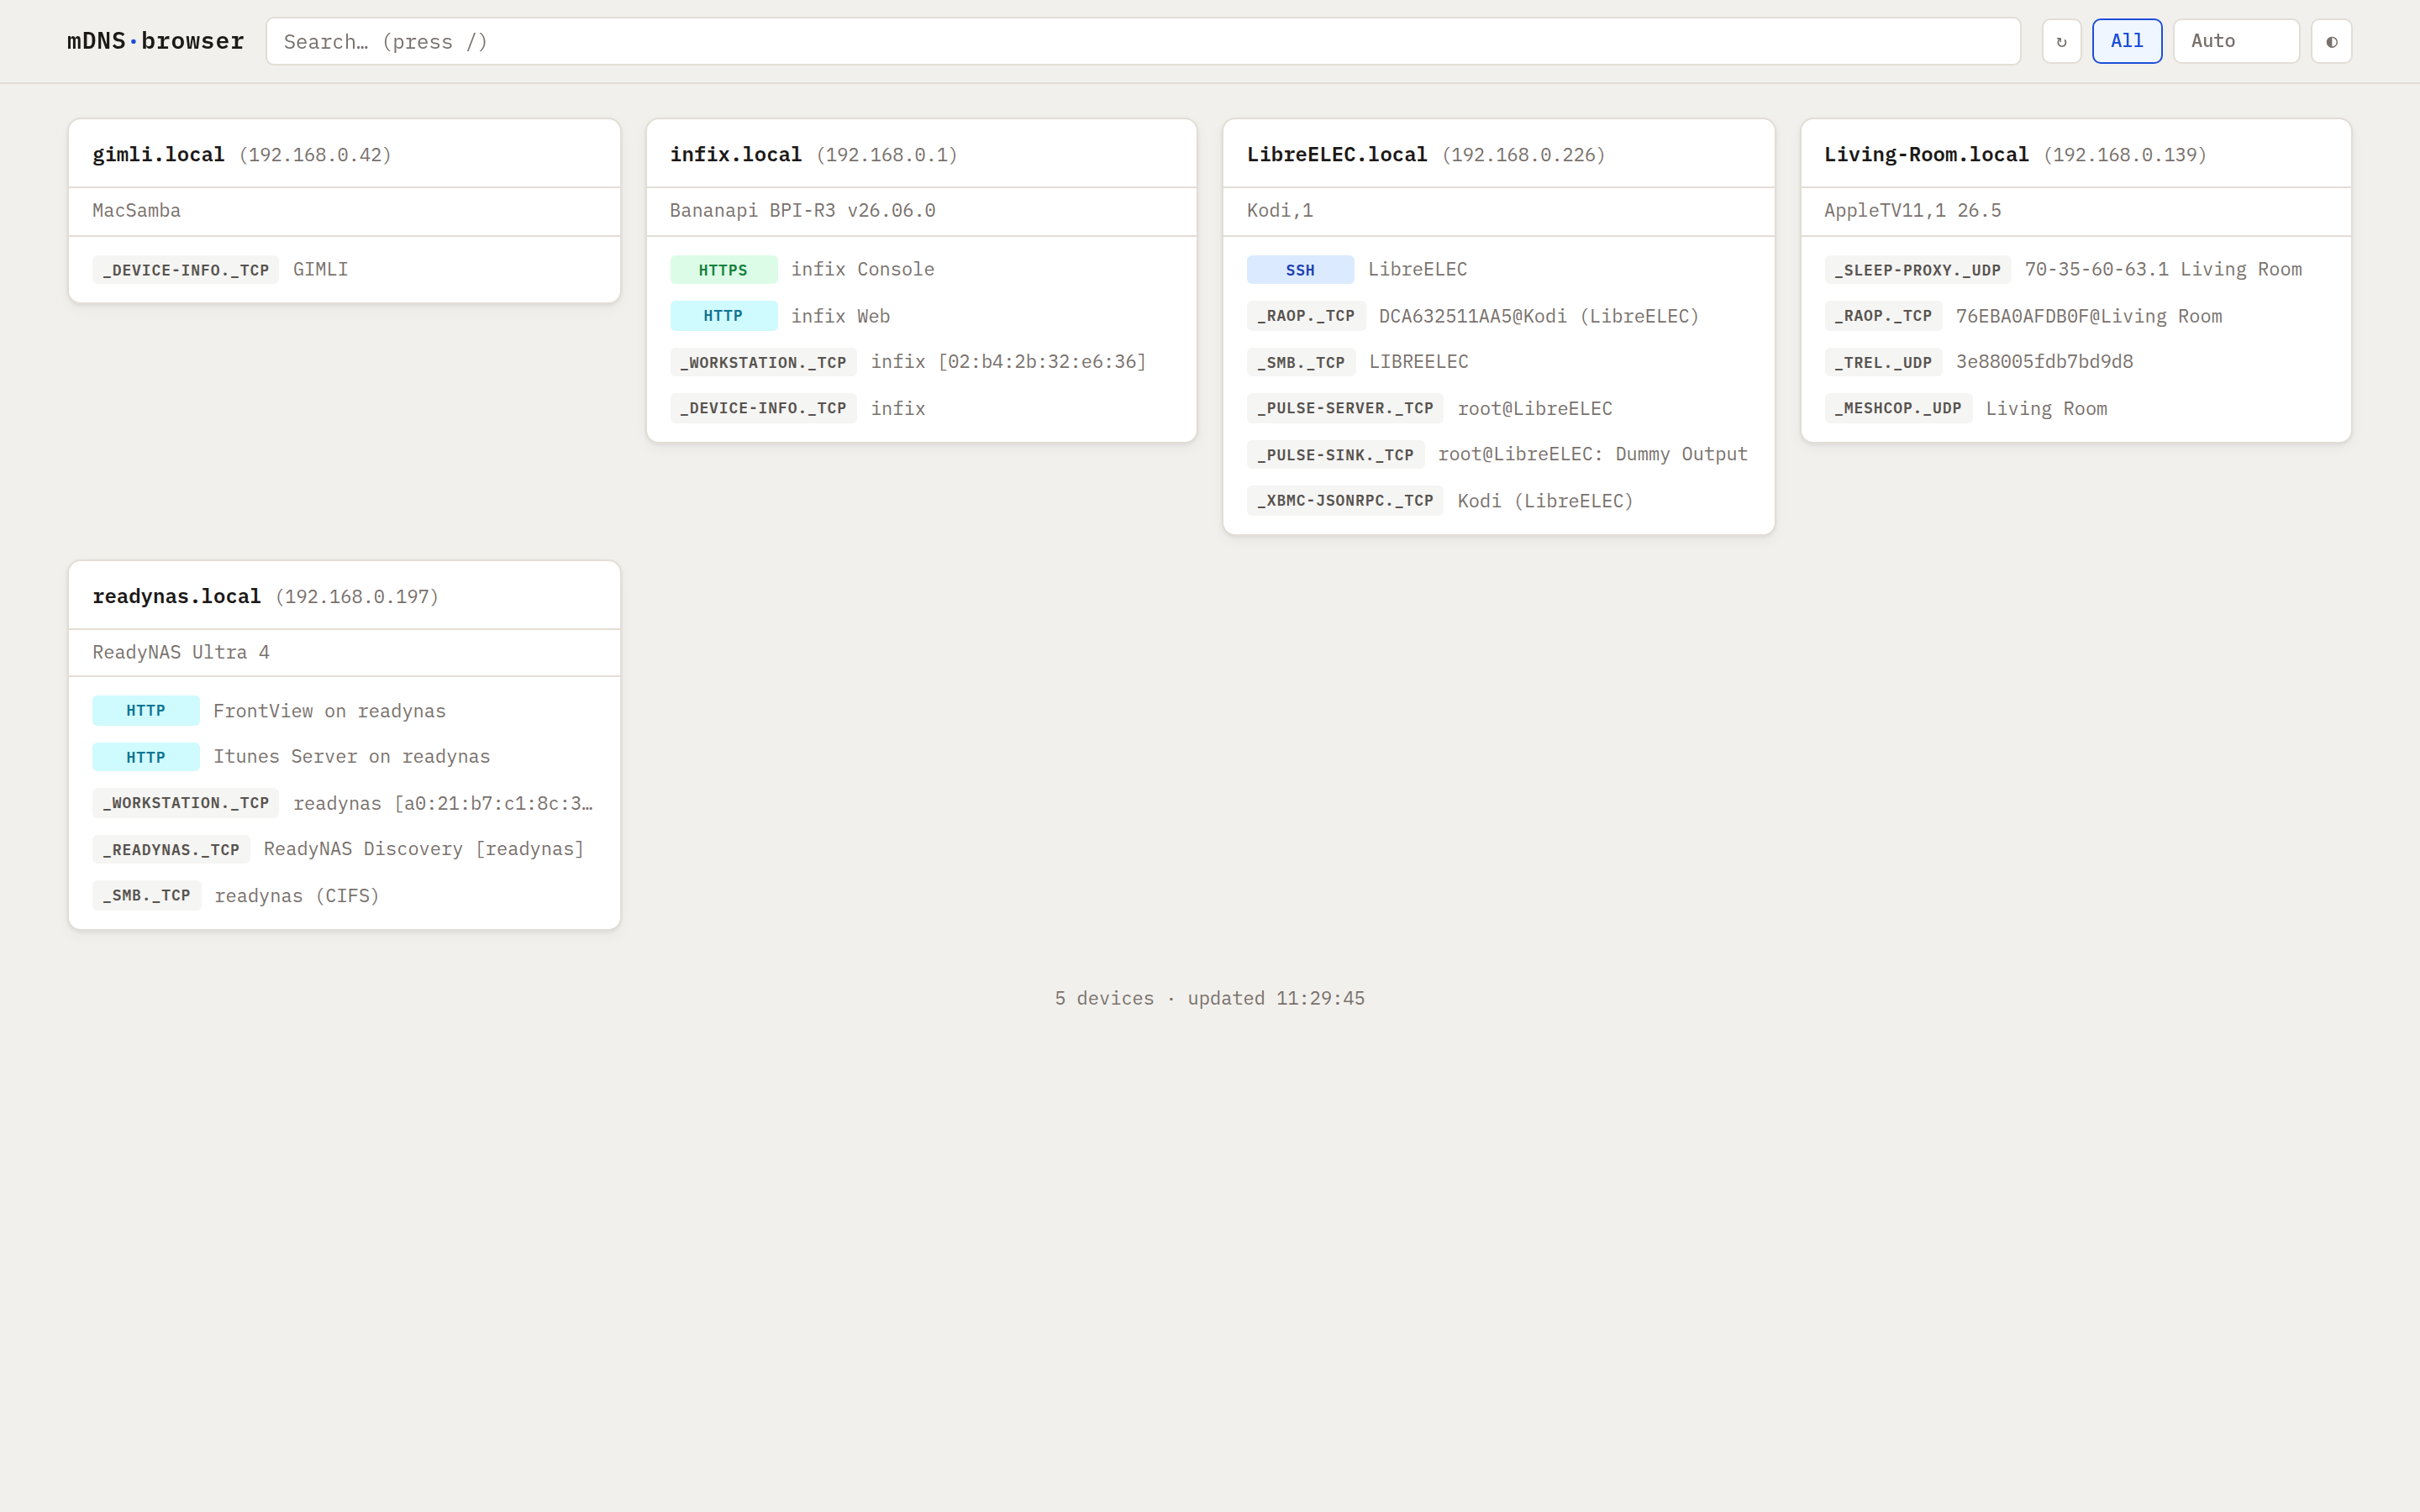 Figure 7:
 network.local in All mode — the whole mDNS neighbourhood, with the Infix gateway among it.
This first release lays the groundwork. Expect the curated pages to keep growing in the releases ahead. My colleague Mattias will follow up with a closer look at another v26.06 highlight, Wi-Fi roaming and mesh, so stay tuned.